The Ultimate Guide to Back to School Collection Clipart PNG: Everything You Need to Know
As the summer months wind down and the familiar hum of classrooms begins to stir, educators, parents, and content creators alike start preparing for the back-to-school season. Among the most versatile and sought-after resources for this time of year is the Back to School Collection Clipart PNG. But what exactly makes this digital asset so indispensable, and how can you use it to elevate your projects? Whether you are a teacher designing classroom decor, a parent crafting personalized school supplies, or a small business owner creating marketing materials, understanding the full potential of this clipart collection can transform your workflow and creative output.
In this comprehensive guide, we will explore the Back to School collection clipart PNG from the ground up. We will break down its features, examine its practical relevance in modern life, and provide actionable tips for getting the most out of every element. By the end, you will have a clear understanding of why this collection is a must-have resource and how to integrate it seamlessly into your projects.
What Exactly Is a Back to School Collection Clipart PNG?
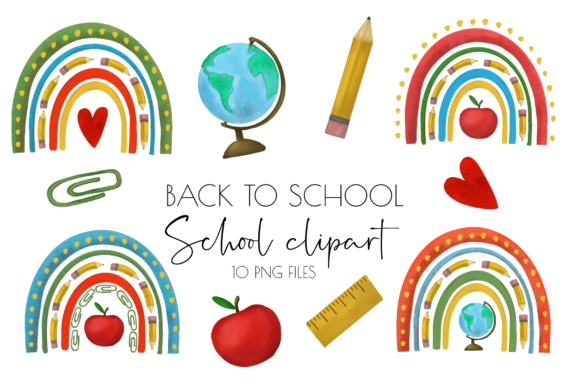
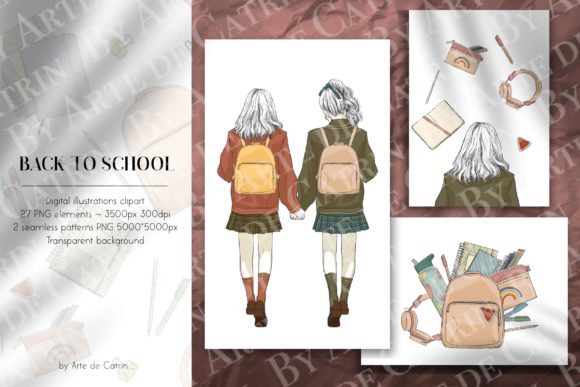
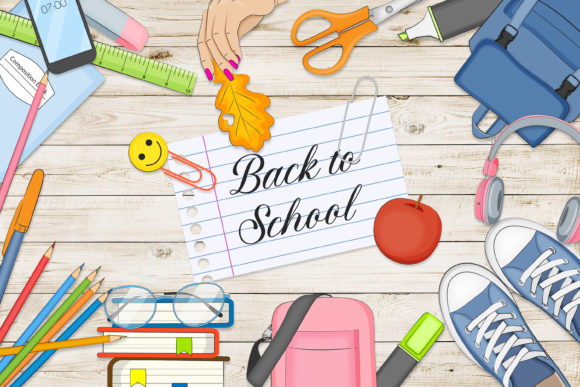
At its core, a Back to School Collection Clipart PNG is a curated bundle of digital illustrations designed around the theme of returning to school. These illustrations typically include icons and graphics such as pencils, books, apples, school buses, backpacks, globes, graduation caps, rulers, chalkboards, and other educational motifs. Each element is saved in the PNG file format, which stands for Portable Network Graphics.
The PNG format is widely favored for clipart because it supports transparent backgrounds. This means that when you place a PNG image onto a document, presentation, or website, you do not see a white or colored box around the graphic. Instead, the icon blends naturally with whatever background you choose. This transparency is a game-changer for designers and non-designers alike, as it eliminates the need for manual cropping or masking.
The specific collection we are focusing on arrives as a single ZIP file containing 48 individual PNG elements. Each element is rendered at a generous 3600x3600 pixel resolution with 300 DPI (dots per inch) in the RGB color space. These specifications might sound technical, but they have direct implications for the quality and versatility of the images you will use.
Key Features of This Back to School Clipart Bundle
Understanding the features of this collection helps you appreciate its value and decide how best to deploy it. Here are the standout characteristics:
- 48 Unique Elements: The bundle includes nearly five dozen individual graphics, giving you a wide variety of icons to mix and match across different projects. You are not limited to just a few generic images; instead, you have a comprehensive toolkit.
- 3600x3600 Pixel Resolution: This is a very large image size. To put it in perspective, a typical smartphone screen might be around 1080 pixels wide. A 3600x3600 image gives you enormous flexibility. You can use it for small social media graphics or blow it up for large-format posters and banners without any loss of quality or pixelation.
- 300 DPI: DPI refers to print quality. Standard web graphics are often 72 DPI, which looks fine on a screen but can appear blurry when printed. At 300 DPI, these clipart elements are optimized for professional-grade printing. Whether you are making flyers, stickers, or classroom handouts, the printed result will be sharp and crisp.
- Transparent Background: As mentioned, PNG transparency allows you to layer these graphics over any color, pattern, or photo seamlessly. This is essential for creating polished, professional-looking designs without extra effort.
- RGB Color Mode: RGB (Red, Green, Blue) is the standard color space for digital screens. This ensures that the colors appear vibrant and accurate on monitors, tablets, and projectors.
When you receive the ZIP file, all 48 elements are ready to use. Simply unzip the folder, and you can immediately drag and drop the PNG files into your preferred design software, document editor, or presentation tool.
Why 3600x3600 Pixels and 300 DPI Matter for Your Projects
It is easy to overlook resolution and DPI specifications, but they directly affect what you can do with the clipart. Let us clarify these concepts because they are often misunderstood.
Resolution (3600x3600) determines the amount of detail the image holds. Higher resolution means more pixels, which translates to sharper edges and finer details. With a 3600x3600 image, you can scale the graphic down for small icons or scale it up significantly for large banners without encountering the "jaggies" or blurriness that come with low-resolution images.
DPI (300) dictates how the image translates to physical print. A 300 DPI image printed at its full resolution would produce a print roughly 12 inches by 12 inches (since 3600 pixels divided by 300 DPI equals 12 inches). This is large enough for wall posters, bulletin board decorations, or even fabric transfers. If you only need a small graphic, you can reduce the image size in your design software, but the inherent quality remains high.
For digital use, such as on a website or social media, 300 DPI is not strictly necessary, but it does not hurt. The extra resolution ensures that if you later decide to print your digital design, you do not have to recreate it from scratch. This dual-purpose versatility makes the collection suitable for both online and offline applications.
Practical Uses for Back to School Clipart PNG Files
The true value of this clipart collection lies in its real-world applications. Here are some of the most effective ways to put these graphics to work in modern life, education, and business:
For Teachers and Educators
- Classroom Decor: Print and cut out the clipart to create vibrant bulletin boards, door decorations, or wall displays. The transparent background makes it easy to arrange multiple elements together.
- Worksheets and Handouts: Add a visual element to your lesson materials. A small pencil or book icon can make a worksheet feel more inviting, especially for younger students.
- Digital Presentations: Enhance your PowerPoint, Google Slides, or Keynote presentations with themed graphics that reinforce the back-to-school message without distracting from the content.
- Name Tags and Labels: Use the clipart to design custom name tags, cubby labels, or supply bin identifiers. The large resolution means you can resize them to fit small stickers or large signs.
For Parents and Families
- Personalized School Supplies: Create custom labels for notebooks, folders, and lunchboxes. Simply add your child's name alongside a fun clipart icon using a free design tool like Canva.
- Party Invitations and Decor: If you are hosting a back-to-school celebration, use the clipart to design invitations, banners, and cupcake toppers. The consistent theme ties the whole event together.
- Organizational Charts: Make chore charts, homework trackers, or school calendars more engaging with colorful icons that motivate children.
For Small Business Owners and Content Creators
- Social Media Graphics: Stand out on platforms like Instagram, Pinterest, or Facebook with eye-catching posts that feature high-quality, transparent-background clipart. Use them to promote back-to-school sales, blog posts, or product launches.
- Newsletters and Email Campaigns: Add visual breaks to your email newsletters with relevant icons. They help guide the reader's eye and make your content more scannable.
- Etsy and Print-on-Demand Products: If you sell digital or physical products online, these clipart elements can be the foundation for stickers, digital planners, coloring pages, or SVG cuts for vinyl projects.
- Blog and Website Visuals: Use clipart as featured images, section dividers, or bullet point accents. The transparent background ensures they integrate smoothly with your site's design scheme.
How to Use Transparent Background PNGs in Your Designs
If you are new to working with PNG files, the process is remarkably straightforward. Here is a quick primer:
- Unzip the File: Extract the contents of the ZIP folder to a location on your computer where you can easily find them.
- Open Your Design Software: This could be anything from Adobe Photoshop, Illustrator, or Canva to Microsoft Word, PowerPoint, or even Google Docs.
- Drag and Drop or Insert: Most programs allow you to simply drag the PNG file from your folder onto your canvas. Alternatively, use the "Insert Image" or "Place" command.
- Layer and Arrange: Because the background is transparent, you can place the clipart over any color or image. Use layers in your software to position the graphic behind or in front of other elements.
- Resize as Needed: Grab a corner handle and drag to resize. Thanks to the 3600x3600 resolution, you can shrink the image significantly or enlarge it without quality loss.
- Save Your Work: When you are finished, save your project in a format that preserves your layout (PDF for print, JPEG or PNG for digital).
One common mistake beginners make is to enlarge a PNG too much. While these clipart elements are high resolution, zooming in beyond 100% of the original size can still introduce softness. For best results, keep the image at or below its original dimensions, or scale down rather than up.
Tips for Choosing the Right Back to School Clipart
With 48 elements at your disposal, you might wonder how to select the best ones for a specific project. Here are some guidelines to help you choose effectively:
- Match the Tone: Consider the mood you want to create. Bright, colorful pencils and smiling apples work well for young children and fun projects. More subdued or classic icons like globes and books may be better for high school or adult education contexts.
- Consider Your Medium: For small digital icons, choose simple graphics with clear outlines. For large printed banners, detailed images can be appreciated because there is room to see the fine details.
- Build a Cohesive Palette: Even though each element comes in its own colors, you can apply color overlays in your design software to unify them. Look for images that share a similar style or level of detail so they feel like part of a set.
- Think About Scalability: Some graphics work better at small sizes than others. An apple or a pencil is easily recognizable even when tiny. A detailed school bus with many small windows might become cluttered at very small sizes.
Common Misunderstandings About Clipart and Digital Graphics
There are a few assumptions about clipart that can lead to disappointment or misuse. Clarifying these will help you get the best experience from your Back to School collection clipart PNG.
Misunderstanding 1: "All clipart is low quality." This may have been true in the early days of the internet, but modern clipart collections like this one offer professional-resolution graphics that rival custom illustrations. The 300 DPI and 3600x3600 specifications place this bundle in the high-quality category.
Misunderstanding 2: "PNG files can be edited like vector files." PNG is a raster format, meaning it is made of pixels. You cannot easily change the color of a single element or scale it infinitely without quality loss, unlike vector formats (SVG, AI, EPS). However, you can apply filters, color overlays, or layer blending modes in your software to modify the appearance.
Misunderstanding 3: "More elements are always better." While 48 elements provide great variety, quality matters more than quantity. This collection focuses on thoughtful, well-designed icons that cover the essential back-to-school theme without overwhelming you with clutter.
Misunderstanding 4: "You need expensive software to use PNGs." Not at all. Free tools like Canva, GIMP, or even Microsoft Word can handle PNG files with transparency. You do not need to be a professional designer to create beautiful results.
Making the Most of Your Back to School Collection
To truly maximize the value of your Back to School Collection Clipart PNG, consider these advanced strategies:
- Create a Design System: Choose a handful of core icons and use them consistently across all your back-to-school materials. This builds visual recognition and a professional look.
- Combine with Textures and Patterns: Place the clipart over a subtle pattern or texture (like lined paper, chalkboard, or denim) to add depth to your designs.
- Use in Video and Multimedia: PNG transparency means you can import these graphics into video editing software (like iMovie, Premiere Pro, or CapCut) and layer them over video footage for animated titles or lower thirds.
- Organize Your Files: Keep your unzipped clipart folder organized by category or color. This saves time when you are searching for a specific icon later.
- Share with Colleagues or Friends: If you are a teacher or team leader, consider sharing the collection with your peers. Consistent visual branding across a school or organization can create a cohesive environment.
Conclusion
The Back to School Collection Clipart PNG is far more than a simple set of images. It is a versatile, high-quality resource that empowers educators, parents, business owners, and creators to produce visually engaging materials with minimal effort. With 48 large-scale, transparent-background elements at your fingertips, the possibilities are limited only by your imagination.
Whether you are designing a classroom welcome sign, a promotional social media post, or a set of custom stickers for your child's supplies, this collection provides the foundation you need. The combination of 3600x3600 resolution, 300 DPI, and PNG transparency ensures that your projects look professional and polished, whether they appear on a screen or in print.
Remember, if you ever have questions about using the clipart or want to explore creative ideas, do not hesitate to ask. This collection was made with care and love, and it is designed to make your back-to-season creative, productive, and enjoyable. So unzip that file, pick your favorite icons, and start designing. Your classroom, your business, and your family will thank you.